Step 1
Connect the USB from the ECU to your screen.
Step 2
Mount the sensors in your installation. One sensor for every strut and one extra sensor in your pressure tank. Connect the sensors according the labels on it.
FL = Front left
FR = Front right
RL = Rear left
RR = Rear right
No label = Pressure tank
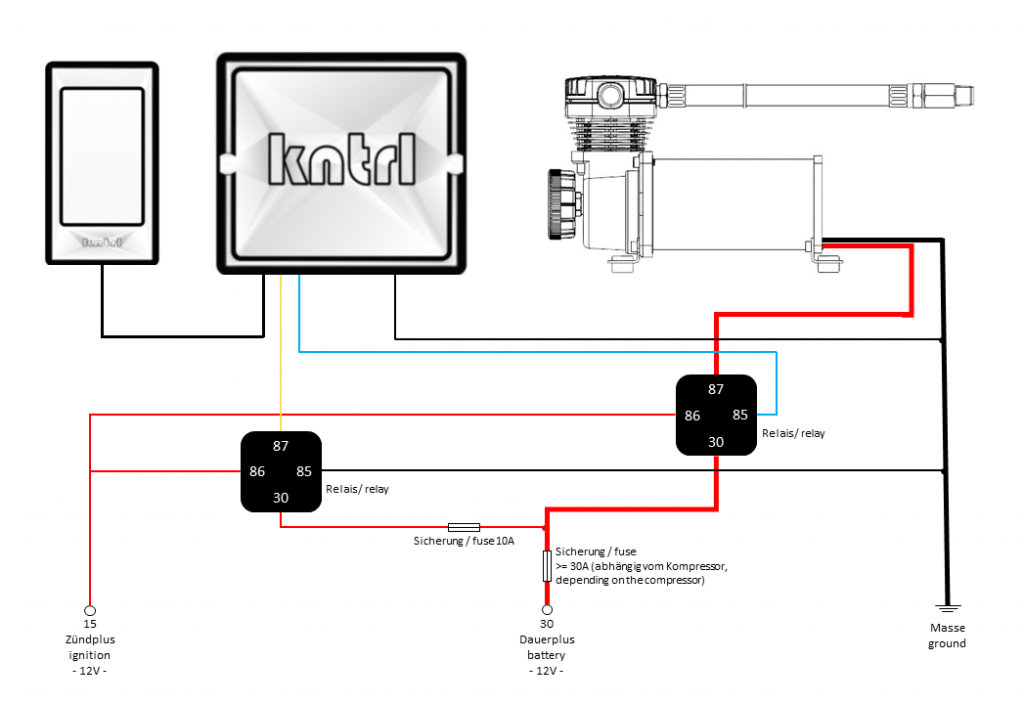
Step 3
Connect the +12V and GND to your car’s system as stated in the image on the left. The fuse and relayare not included in your kntrl kit.
Step 4
(OPTIONAL) Connect the blue GND signal wire from the kntrl ECU to the compressor relay GND’s connection. This will make the kntrl ECU control your compressor’s relay wich powers up your compressor.
WARNING! Do not connect directly to your compressor.
Step 5
Double check all connections for polarity! After double checking you can power up the system. The screen should show the kntrl logo for a couple of seconds while booting. After booting up, the system should go to the home screen.
You are now in kntrl
Your system has basic settings pre-programmed. We strongly recommend to change the settings to match your car. You have to start with the calibration function. Follow the link and work through the steps on the callibration page. If you have any questions on setting up, make sure to hit us up! We are happy to help.